HEXBUGS Nano Bugs are just about the coolest toy to come down the pike in a long time.
What in the world is a HEXBUG Nano?
HEXBUG Nano's are tiny, little robotic critters that behave just like real bugs. They are battery powered (My favorite thing about HEXBUGS? They include batteries!), have 12 little legs and vibrate to move themselves around their habitat trails and the floor. If they tip over, the flip their little selves back over and get back on their way. If something is blocking their way, they flip change direction and keep on going. And they are FAST...really fast. And so much fun!

My boys were already well aware of HEXBUGS as Santa left them in their stockings at Christmas (as well as a Nano Bridge Battle Habitat Set), it was so much fun to see the other kids at our little party experience HEXBUG Nano's for the first time. We had 13 kids here and only 2 of them had ever heard of HEXBUGS before. In fact I got three phones calls from Mom's tonight asking me where they could get more Nano's for their kids.
It's so cool to be able to introduce kids and Moms to new, fun toys.:)
**"Like" HEXBUG Micro Robotic Creatures on Facebook**
This project is cute, quick and easy. Just how I like my crafts. This is perfect for preschoolers, but the big kids liked it too.
First lay newspaper down to protect your work surface. Next, have each child choose a color of construction paper. Using black acrylic craft paint and a big sponge brush, have your child paint the bottom of their entire hand. Older kids can do this themselves, smaller kids might need a little help. Then have them place their painted hand down on the construction paper, pressing to make sure they get a nice hand print. By the time the kids finish washing their hands, their hand prints should be just about dry. Turn the paper upside down to make your lamb. Your four fingers become the lamb's legs and your thumb becomes the lamb's head. Glue cotton balls all over the palm to create the lamb's fluffy body and a wiggly eye to the thumb and you have a cute Lamb!
Easter is just a few days away. Here's a hodge podge mix of Easter ideas for you!
JerseyFamilyFun.com has great ideas to share on Candy-Free Easter Eggs for Girls, Candy-Free Easter Eggs for Boys and Candy-Free Easter Eggs for Toddlers! As well as ideas for Edible, but Candy-Free Easter Eggs!
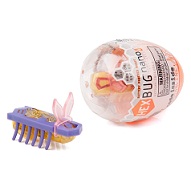
Speaking of Candy-Free Easter...have you seen the Limited Edition HEXBUG Nano Easter eggs? We're huge HEXBUG fans at our house! These HEXBUG Nanos are packaged in a little plastic Easter egg and come wearing a pair of removable bunny ears! Love them!
I love these Mr. Potato Head Easter Bunnies too!
My boys will be getting some candy and chocolate, but the majority of their Easter treats will not be edible.
A few other things they'll find in their baskets:
Stickers
Books
Matchbox Cars
Play-Doh
Coloring Books
Tooth brushes (Santa puts new tooth brushes in their stockings on Christmas, so it only makes sense that the Easter Bunny would put new tooth brushes in their Easter baskets.)
Do a Google search for "free Easter coloring pages"
to find and print coloring pages and worksheets to keep your kids busy. These are great to help beat spring break boredom. They're also great to occupy kids while you're cooking Easter dinner. Here's a few pages we've colored in our house this week:
Dora and boots Easter Coloring Page
Winnie The Pooh Easter Coloring Page
Piglet Easter Coloring Page
Max & Ruby Easter Coloring Page
and here are a whole bunch more free printable Easter Coloring Pages!
Do you leave milk and cookies out for Santa on Christmas Eve? How about leaving carrots and celery out for the Easter Bunny on the night before Easter? We'll also be leaving chocolate milk out for the Easter Bunny because Sean somehow got it in his head that the Easter Bunny likes chocolate milk. Now Daniel...Daniel got it in his head that the Easter Bunny is a girl. Crazy Kids. I think Easter traditions are often overlooked. Most families have tons of traditions they follow at Christmas each year, but not many for other holidays. Come up with an Easter tradition that's unique to your family.
Quick and Easy Easter Jelly Bean Fudge Recipe...
Here's what you need:
2 cups of white chocolate chips
(1) 16 oz. container of vanilla frosting
2 cups of the tiny jelly beans (pastel colors will look pretty in the white fudge)
Here's what you do:
1) Melt the white chocolate chips according to the package directions, usually in a saucepan over very low heat, stirring constantly until melted.
2) Add the vanilla frosting and continue stirring until mixture is smooth. Remove from the heat and let cool slightly. The fudge mix needs to still be easy to stir but not so hot as to melt the jelly beans.
3) Add the jelly beans and stir. Line a baking pan with foil and mist it with non-stick cooking spray. Pour the fudge mix into the pan, spread evenly and cool to room temperature.
4) Cover with foil and refrigerate for at least 2 hours. Remove the foil and the fudge from the pan together and place it on a cutting board. Carefully remove the foil and then cut the fudge into bite-sized pieces. This recipe should make about 3 dozen pieces.
Carrot Science Experiment:
All you'll need is a shallow dish, water and the top 1 inch of a carrot.
Place the carrot in the dish and add enough water to cover about half the carrot, leaving the top uncovered. Check the carrot each day to make sure the stump stays wet, add a little water if needed. In about 2 weeks time the carrot top will start to grow lacy leaves and you'll have a pretty little plant.
This is a fun and super easy project for a child of any age and a sure fire way to beat Spring Break Boredom!
I give you...Coffee Filter Butterflies!
You probably have everything you need to make this project and if you don't, any of these items can be found at the dollar store.
You need:
Coffee Filters
Markers (Non-washable work best. Not permanent, non-washable. And yes, they will wash out, just not as easily as washable.)
Spray Bottle with Water
Clothes Pins
Optional -
Black Pipe Cleaners (Or "chenille stems" as they're now called.)
Wiggly Eyes
Lay newspaper down to cover your work surface. Place a coffee filter on the newspaper and flatten it out.
Next, color the coffee filter with markers. You can make an intricate design or simply scribble all over it with a variety of colors.
After your coffee filter is colored. Spray it down with water and allow the markers to bleed and blend on.
After spraying the coffee filter, you can transfer to to a dry piece of newspaper or lay it on a cooking rack to dry.
While you wait for your coffee filter to dry, you can color the front of a clothes pin with marker.
Once your coffee filter is dry, fold it back and fourth accordion style in about 1/2" pleats.
Until it looks like this:
Then fold the coffee filter in half, hold it in the middle by the fold and clip your clothes pin on to it. Your clothes pin becomes the butterflies body and the the coffee filter it's wings. Fan the folds out on each side.
If you have them, you can use small pieces of black pipe cleaners to form a "V" shape, curl each end by wrapping it around the end of a pencil and then clip it in the clothes pin to give the butterfly antennae. You can also glue tiny wiggly eyes to the front of the clothes pin.
Here's a few ideas...
For a more vibrant butterfly, color the entire with coffee filter, filling in all the white.
Instead of using every color marker in the box, color one coffee filter with all warm colors (red, orange, yellow) and one with all cool colors (purple, blue, green) for a nice effect.
Clip the butterflies to curtains in your home to add pizazz to any room.
Glue a magnet to the back of the clothes pin and hang your butterfly on the fridge.
Tie a piece of fishing line around the top of the clothes pin and hang your butterfly from a ceiling fan or from the ceiling to make it look like it's flying.
This week kids all over Cape May County (and all over the country) are enjoying the time honored tradition of driving their parents insane over Spring Break.
Here are a few Spring Break Survival Strategies to bring more fun to your time together and keep your sanity with a house full of kids for a week:
Stick to a morning schedule - Have your kids do their normal grooming every morning, baths, brush teeth get dressed, etc., just like it were a normal school day. No one wants to fight with their child to get out of their pajamas at 1 o'clock on the afternoon. Your kids just might be less inclined to lounge around and sit in front of the TV if they're dressed.
Get Outside - It's not negative 12 degrees anymore so there's no excuse for not getting outside in the yard. Pray for no rain. Fresh air and Vitamin D from the sun will do wonders for your kids - and for you too!
Set a time for quiet time - You don't want your kids sitting around bored all Spring Break, but you don't want them running around non-stop either. It's important for everyone - kids and grown-ups alike - to have some down time each day. Set a time of day (perhaps after lunch) that is reserved for quiet time.
Get Creative - Gather your art supplies (paper, crayons, markers scissors, paint, glue, glitter, etc.), lay some newspaper down on the kitchen table and let your kids creative juices get flowing. You'll be amazed what your kids can come up with!
Hold Baking Class - A box of cake mix and a tub of icing is all you need to hold a simple baking class for your kids. Let them measure, pour and mix. Send them outside to play while the cake is in the oven then bring them back in once the cake is cooled to ice it. It might not look like it came from a bakery, but you're kids will be so proud of the job they've done.
There's Strength In Numbers - You're not the only parent who's up to their eyeballs in kids this week. Call friends and arrange to exchange play dates or set up a play date for everyone at the playground.
Check out these ideas to beat spring break boredom: Easter Games and Cardboard Tube Bunnies!!!
Also, check out Heidi's post on Tips for Surviving Spring Break on Cape May Moms!
This project, making cute little bunnies from cardboard tubes, is one the whole family can have fun with. Big kids can do most of this project on their own, for little kids you might want to do some of the prep for them before hand.
Here's what you need (most of which you probably have laying around your house right now):
Cardboard tubes (Paper towel and toilet paper rolls work well, you can cut them down to different sizes to make different sized bunnies. The purple bunny above was made from a duct tape roll.)
Acrylic Craft Paint - These are often on sale at Michael's 2/$1.00. They're super cheap, you can use them on anything and clean up is a breeze. I use them for all projects I do with my kids.
Paint brushes
Scissors
Glue
A paint marker or Sharpie marker
Pom-Poms for the bunnies nose (If you don't have Pom-Poms, you can paint or draw a little nose with marker.)
Wiggly Eyes (Again, a dab of paint or a marker will work just fine if you don't have these.)
Anything else you might want to embellish your bunny with!
Gather all of your supplies, lay some newspaper down and you're ready to roll!
(Pun intended.)
The first step is to paint your cardboard tubes. In the interest of time, I didn't paint the inside of the tubes. If you're kids are making these to give as Easter gifts or you'll be using them as a centerpiece on a table, then you'll want to paint the inside of the tube too.
The cardboard tubes are the body of your bunnies. The next step is to make your bunnies ears by cutting strips of cardboard tubes.
Fold the strips in half and run a line of glue between the two sides. Squeeze to flatten it.
For some reason I thought that super glue would do a super job of this and work much better and quicker than any other glue in my collection. Not so much. And this is why I should never use super glue...
I'll be chewing super glue off my fingers for the next three days.
Moving right along...
Next you are going to paint the ears in pairs to match the cardboard tubes you've already painted.
Then paint a strip of pink paint down the center of each ear and snip off the sides on the top of each ear to make them look more like bunny ears. My ears could definitely look more like ears.
Now glue the ears to the top inside of each cardboard tube body.
Starting to actually look like bunnies, right? All that's left to do is give your bunny a face. You can use a paint or sharpie marker to draw your bunnies faces or use wiggly eyes, pom-poms or buttons.
You're not allowed to see the white bunny's face. Something went very wrong with the white bunny's face.
Some ideas as to what to do with your completed Cardboard Tube Bunnies:
Slip your fingers inside the tube and use your bunnies as puppets to act out an Easter skit.
Have your kids give them as Easter gifts to friends and loved ones or as a favor to take home from Easter dinner.
Make a family of bunnies and use them as the centerpiece on your table at Easter dinner.
Make one for each guest at Easter dinner, write their name on the front and use them as seating place markers.
I'd love to hear about your experience and/or see photos if you decide to make these Cardboard Tube Bunnies with your kids!
The kids are off school for 10 days for Spring Break. Every day this week I'll be posting Easter and Spring arts and crafts projects and other fun ideas to help beat Spring Break boredom!!!
Here are some fun and easy Easter games to play with your kids this week:
Chick, Chick, Bunny!
Put an Easter twist on the traditional game of Duck, Duck, Goose! The game is played the same but instead of saying "Duck, Duck, Goose!", you'll be saying "Chick, Chick, Bunny!". Have everyone sit in a big circle. Including you! You're not too old for Duck, Duck, Goose! You are NEVER too old for Duck, Duck, Goose! Whoever is "it" will walk around the outside of the circle tapping each "chick" on the head saying "Chick, chick..." as they do, until they decide who will be the "bunny". Whoever is chosen as the bunny will stand up and chase the first bunny around the circle. To add some more Easter to the game, instead of having them run around the circle, have them hop like bunnies around the circle. If the first player makes it back around to the empty spot in the circle without being caught,
the second player comes the bunny.
Egg and Spoon Race
Nothing says Easter fun like an egg and spoon race. You can use raw eggs for older children and hard-boiled eggs for younger kids. Divide the players into two groups, have one group line up side by side at one end of the yard and the other group do the same at the opposite end of the yard. Start all the players on one side with an egg and a spoon. Have them place their egg on the spoon and hold the spoon in one hand. On the count of three, they need to race to their partner on the other side of the yard (without dropping their egg) and hand off the spoon and egg to them. The first team to make it back to the starting line wins! You can come up with variations of this to make it easier for younger children or more difficult for bigger kids, like adding laps or setting up a small optical course.
Pin The Tail On The Easter Bunny
Put an Easter spin on the traditional birthday party game of Pin The Tail On The Donkey!
Draw a big rabbit shape on a piece of poster board or cardboard. Cut it out and tape it to the wall. Each player gets a cotton ball with double-sided sticky tape attached to it. Line them up, blindfold them and have them (one at a time) try their aim at pinning the tail on the bunny. The child who places their tail closest to the Easter Bunny's tail wins! If you have a lot of kids playing, use markers to color a spot on the cotton balls so you know who's is who's.
Easter Egg Hunt
You can't go wrong with an Easter Egg Hunt! Fill plastic eggs with small treats toys or coins, hide them inside or out and let the kids go wild searching for them! A neat idea for a family egg hunt is to include special reward coupons inside some of the eggs, such as "This coupon entitles you to an extra 30 minutes of TV time."
Easter Egg Nose Roll Race
This game is sure to give everyone a serious case of the sillies. Each player gets an egg. I'd recommend hard-boiled eggs for this game! Use jump ropes, clothes lines or brooms to set up a start line and a finish line. Line up all the players at the start line, then tell them to get down on their hands and knees and that they have to roll the egg to the finish line using only their noses! Whoever makes it to the finish line, using only their nose to roll the egg, wins.
Put On Bunny Shadow Puppet Shows
All you need for this is a flashlight, a wall and your own two hands...and maybe a little imagination! Point the flashlight at the wall, put your hand up to the wall until it makes a shadow, you may have to move the flashlight around a bit until you have a sharper picture. Use your hands to make a rabbit shadow puppet and then make up a short story for your rabbit. Whoever comes up with the best story/show wins! (How To Make a Bunny Shadow Puppet: Hold your right hand out in front of you so that you are looking at the palm of your hand. Make a peace sign with your middle and index fingers to make your bunny's ears. Put your pink and ring fingers on top of your thumb. Turn your wrist away from you and you'll be able to see your bunny's eyes. For little kids, a peace sign rabbit will work just fine.)
Check back each day this week for more ideas on beating Spring Break boredom!


